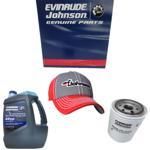
0391428 CLAMP SCR. & HAND. ASSY. EVINRUDE
E2RCIB, E2RCNE, E2RCOC, E2RCRS, E2RCTD, E4BRCICI, E4BRHCNR, E4BRHCOB, E4BRHCRM, E4BRHCTA, E4WCIC, E4WCNR, EJR-CDR, EJR-CUA
CLAMP

Price: query
Rating:
Compatible models:
BRP EVINRUDE entire parts catalog list:
- EXHAUST HOUSING » 0391428
E2RCOC 1985
E2RCRS 1984
E2RCTD 1983
E4BRCICI, E4BRLCIC 1981
E4BRHCNR, E4BRHLCNR 1982
E4BRHCOB, E4BRHLCOB 1985
E4BRHCRM, E4BRHLCRM 1984
E4BRHCTA, E4BRHLCTA 1983
E4WCIC 1981
E4WCNR 1982
EJR-CDR 1986
EJR-CUA 1987
Information:
Illustration 1 g01303631
Schematic for the analog sensor
Test Step 1. INSPECT THE ELECTRICAL CONNECTORS AND WIRING
Remove the electrical power from the engine. Note: For the following steps, refer to Troubleshooting, "Electrical Connectors - Inspect".
Thoroughly inspect each of the following connectors:
J1/P1 connectors
J7/P7 connectors
Check the torque of the allen head screws for the ECM connectors.
Perform a 45 N (10 lb) pull test on each of the wires that are associated with the circuit for the analog sensors.
Check the harness and wiring for abrasion and for pinch points from the analog sensors to the master ECM. Expected Result:All connectors, pins, and sockets are connected properly. The connectors and the wiring do not have corrosion, abrasion, or pinch points.Results:
OK - All connectors, pins, and sockets are connected properly. The connectors and the wiring do not have corrosion, abrasion, or pinch points. The components are in good condition with proper connections. If you are troubleshooting a -3 code, proceed to Test Step 3. If you are troubleshooting a -4 code, proceed to Test Step 2.
Not OK - At least one of the connectors, pins, and/or sockets are not connected properly. At least one of the connectors and/or the wiring has corrosion, abrasion, or pinch points.Repair: Perform the necessary repairs and/or replace parts, if necessary.STOPTest Step 2. CREATE AN OPEN CIRCUIT FOR THE SENSOR
Disconnect the sensor that has the "voltage below normal" diagnostic code.
Observe the "Active Diagnostic" screen on Cat ET. Allow a minimum of 30 seconds for any codes to activate. Look for an active -3 diagnostic code. Expected Result:There is an active -3 diagnostic code for the disconnected sensor.Results:
Yes - Before the suspect sensor was disconnected, there was an active -4 diagnostic code for the sensor. After the suspect sensor was disconnected, there was an active -3 diagnostic code for the sensor.Repair: Reconnect the sensor. If the active -4 diagnostic code recurs, replace the original sensor.Verify that the code does not activate when the new sensor is installed. Clear the logged codes from the master ECM.STOP
No - Before the suspect sensor was disconnected, there was an active -4 diagnostic code for the sensor. After the suspect sensor was disconnected, the active -4 diagnostic code remained. Proceed to Test Step 3.Test Step 3. CHECK THE PULL-UP VOLTAGE AT THE SENSOR
Verify that the suspect sensor's connector is disconnected from the engine harness.
Illustration 2 g01303636
Harness connectors for the sensor
(1) Signal
(2) Return
At the harness connector for the suspect sensor, measure the voltage between terminals (1) and (2). Expected Result:The voltage is between 6.0 VDC and 7.0 VDC.Results:
OK - The voltage between the signal terminal and the return terminal is between 6.0 VDC and 7.0 VDC. The pull-up voltage that is created by the master ECM is present at the sensor connector. The signal wire and the return wire for the suspect sensor appear to be OK. Proceed to Test Step 5.
Not OK - The voltage between the signal terminal and the return terminal is not between 6.0 VDC and 7.0 VDC. The pull-up voltage that is created by the master ECM is not present at the sensor connector. Proceed to Test Step 4.Test Step 4. CHECK THE PULL-UP VOLTAGE AT THE MASTER ECM
Use a 151-6320 Wire Removal Tool to remove the signal wire for the suspect sensor from the P1 connector.
Use a jumper wire with
Parts clamp EVINRUDE:
0303596
0303596 CLAMP,Hose,small
100193A, 100293R, 100882B, 100990S, 10424G, 10524C, 10624G, 10724A, 10824M, 10924B, 115083D, 115393M, 115493B, 115593, 115693D, 115790S, 115793S, 115890C, 115983E, 125183C, 125283R, 135383M, 135443B, 135543E, 135643D, 150840S, 150940C, 15404G, 15504C
0553166
0553166 CLAMP,Hose,large
100193A, 100293R, 100882B, 100990S, 10424G, 10524C, 10624G, 10724A, 10824M, 10924B, 115083D, 115393M, 115493B, 115593, 115693D, 115790S, 115793S, 115890C, 115983E, 125183C, 125283R, 135383M, 135443B, 135543E, 135643D, 150840S, 150940C, 15404G, 15504C
0510190
0510190 CLAMP
1002R, 1802S, 18304A, 1902C, 2102A, 2202M, 2302B, 2402E, 2502D, 25302A, 25402M, 25502B, 25602E, 2602S, 2702C, 2802R, 2902A, 33002M, 33802M, 33902A, 40002A, 40052A, 40072A, 40102B, 40202E, 40304D, 40802A, 40852A, 40872A, 40902R, 40952R, 40972R, 9022A,
0315224
0315224 CLAMP, Stern bracket 5" EXTENSION KIT
1002R, 1902C, 2102A, 2202M, 2302B, 2402E, 2502D, 2602S, 2702C, 2802R, 2902A, E2RCIB, E2RCNE, E2RCOC, E2RCRS, E2RCSM, E2RCTD, EJR-CCM, EJR-CDR, EJR-CEB, EJR-CUA, EJR-ESE
0320107

0320107 CLAMP STRAP, Hose
100990S, 10424G, 10524C, 10624G, 10724A, 10824M, 10924B, 115493B, 115593, 115693D, 115790S, 115793S, 115890C, 135443B, 135543E, 135643D, 150840S, 150940C, 15404G, 15504C, 15604A, 175740S, 200640S, 2402E, 2502D, 25402M, 25502B, 25602E, 25702H, 25802C,
0312387
0388346

0388346 CLAMP SCR.&HAND.ASSY
2702C, 2802R, 2902A, 4706B, 4806E, 4904D, 6704M, 6804B, 6904E, E2RCNE, E2RCOC, E2RCRS, E2RCSM, E2RCTD, E4BRHCNR, E4BRHCOB, E4BRHCRM, E4BRHCTA, E4RLCSS, E4WCNR, EJR-CDR, EJR-CUA
0322654

0322654 CLAMP,Hose to carb
2702C, 2802R, 2902A, BE115ELEDR, BE115ELEUA, BE115GLECM, BE130TLECE, BE130TLEDM, BE130TLEUB, BE250CXECB, BE250CXEDA, BE250CXEUM, BE3REDS, BE40EECR, BE40EEDS, BE40EEUC, BE4BREDS, BE4BREUC, BE50BEEDS, BE50ESECC, BE50RLEUC, BE90ELEDR, BE90ELEUA, BE90SLE
