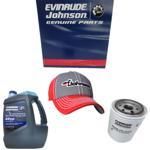
5031514 PLUG, Reservoir EVINRUDE
E40PL4EES, E40PL4SSC, E50PL4EES, E50PL4EES, E50PL4SSC, E50PL4SSC
PLUG

Price: query
Rating:
You can buy parts:
As an associate, we earn commssions on qualifying purchases through the links below
NK 5031514 Support Steering Link
NK Cone Size [mm]: 16 || Thread Size: 16x1,0 || Thread Type: with right-hand thread
NK Cone Size [mm]: 16 || Thread Size: 16x1,0 || Thread Type: with right-hand thread
$41.19
13-10-2020
4.40924524[1.80] Pounds
-: -
Connected Essentials Fully Tailored Car Mats, Premium, Set of 4, Black with Red Trim, 5031514
Complete set of 4 tailored car mats (2 front & 2 rear) - designed & manufactured for Seat Ibiza 2008-2017 || Suitable for all models of Seat Ibiza manufactured from 2008-2017 || Manufactured in the UK from Premium automotive carpet, hand trimmed in premium red banding - for extra strength & durability || Driver's mat with heel pad to provide double thickness - reduce wear and protect footwear || Supplied with 2 clips (fixings) to secure in place
Complete set of 4 tailored car mats (2 front & 2 rear) - designed & manufactured for Seat Ibiza 2008-2017 || Suitable for all models of Seat Ibiza manufactured from 2008-2017 || Manufactured in the UK from Premium automotive carpet, hand trimmed in premium red banding - for extra strength & durability || Driver's mat with heel pad to provide double thickness - reduce wear and protect footwear || Supplied with 2 clips (fixings) to secure in place
BRP EVINRUDE entire parts catalog list:
- POWER TRIM-TILT HYDRAULIC » 5031514
E50PL4EES 1999
E50PL4EES 1999
E50PL4SSC 2000
E50PL4SSC 2000
Information:
Table 1
Required Tools
Tool Part Number Part Description Qty
A 6V-6192 Pliers 1
B 7B-7974 Piston Ring Expander Gp 1
C 5P-8639 Hydraulic Press (Connecting Rod Bearing) 1
8F-0024 Hose Assembly 1
1P-2375 Connecting Coupler 1
1P-2376 Connecting Coupler 1
5P-8651 Spacer 1
5P-8649 Adapter 1
5P-8650 Bushing Adapter 1
9U-6600 Hydraulic Pump 1 Note: Prior to removal from the engine, the pistons and connecting rod assemblies were marked. The components must be reassembled together. The components must be installed in the original location in the engine. Do not interchange any of the components.
Keep all parts clean from contaminants.Contaminants may cause rapid wear and shortened component life.
Illustration 1 g01017742
Illustration 2 g01018268
The connecting rod must be heated for the installation of the piston pin bearing. Do not use a torch.
Raise the temperature of connecting rod (6) along Length (Y) . (Y) Maximum Length for heating the connecting rod ... 93 mm (3.7 inch)
Allow the connecting rod and the bearing to cool to room temperature.
Use Tooling (C) to remove the old bearing and install new bearing (7) at the same time. The adapter of Tooling (C) should make full contact with the surfaces of connecting rod (6) .Note: Orient the bearing joint within 5 degrees of either Location (X) .
Use a pin boring machine to machine the bore of bearing (7) to the correct diameter.Diameter of bearing bore ... 60.035 0.008 mm (2.3636 0.0003 inch)
Illustration 3 g01056145
Position the spring for the oil control ring in the oil ring groove in the piston body assembly.
Position oil control ring (3) over the spring. Position the oil control ring so that the gap is 180 degrees from the joint in the spring. Install the oil control ring on the piston with Tooling (B) .
Use Tooling (B) to install intermediate piston ring (2) with the side that has the identification "UP-2" toward the top of the piston.
Use Tooling (B) to install top piston ring (1) with the side that has the identification "UP-1" toward the top of the piston.
Position piston rings (1) , (2) , and (3) so the gaps are 120 degrees from each other.
Check the clearance between the ends of piston rings (1) , (2) , and (3) . Refer to Specifications, "Pistons And Rings".
Position piston body assembly (4) on connecting rod (6) . Apply clean engine oil to connecting rod pin (8) and install the connecting rod pin. Install pin retainer (5) with Tooling (A) .
Install upper connecting rod bearing (9) in connecting rod (6) .Note: Ensure that the bearing locking tab is located in the notch of the connecting rod.
Install lower connecting rod bearing (10) in connecting rod cap (11) .Note: Ensure that the bearing locking tab is located in the notch of the connecting rod cap.
Ensure that the dowels are installed in the connecting rod cap.End By: Install the pistons and connecting rods. Refer to Disassembly and Assembly, "Pistons and Connecting Rods - Install".
Parts plug EVINRUDE:
5030094

5030094 PLUG, Drain & fill
E25EL4SIC, E25EL4SSS, E30EL4SIC, E30EL4SSS, E40PL4EES, E40PL4SIR, E40PL4SSC, E50PL4EES, E50PL4EES, E50PL4SIR, E50PL4SIR, E50PL4SSC, E50PL4SSC, E5RECS, E70, E70FLTLECS, E70PL4EEC, E70PL4SIA
5030521

5030521 PLUG
E25EL4SIC, E25EL4SSS, E30EL4SIC, E30EL4SSS, E40PL4EES, E40PL4SIR, E40PL4SSC, E50PL4EES, E50PL4EES, E50PL4SIR, E50PL4SIR, E50PL4SSC, E50PL4SSC, E70, E70FLTLECS, E70PL4EEC, E70PL4SIA
5030526
5030948
5030948 PLUG, Cover, drain
E40PL4EES, E40PL4SIR, E40PL4SSC, E50PL4EES, E50PL4EES, E50PL4SIR, E50PL4SIR, E50PL4SSC, E50PL4SSC, E70, E70FLTLECS, E70PL4EEC, E70PL4SIA
5030525
5030525 PLUG, Oil pan
E25EL4SIC, E25EL4SSS, E30EL4SIC, E30EL4SSS, E40PL4EES, E40PL4SIR, E40PL4SSC, E50PL4EES, E50PL4EES, E50PL4SIR, E50PL4SIR, E50PL4SSC, E50PL4SSC, E70, E70FLTLECS, E70PL4EEC, E70PL4SIA
5031289
5031289 PLUG, Oil venturi
E40PL4EES, E40PL4SIR, E40PL4SSC, E50PL4EES, E50PL4EES, E50PL4SIR, E50PL4SIR, E50PL4SSC, E50PL4SSC
5031252
5031252 PLUG
E25EL4SIC, E25EL4SSS, E30EL4SIC, E30EL4SSS, E40PL4EES, E40PL4SIR, E40PL4SSC, E50PL4EES, E50PL4EES, E50PL4SIR, E50PL4SIR, E50PL4SSC, E50PL4SSC
5031253
5031253 PLUG
E40PL4EES, E40PL4SIR, E40PL4SSC, E50PL4EES, E50PL4EES, E50PL4SIR, E50PL4SIR, E50PL4SSC, E50PL4SSC


