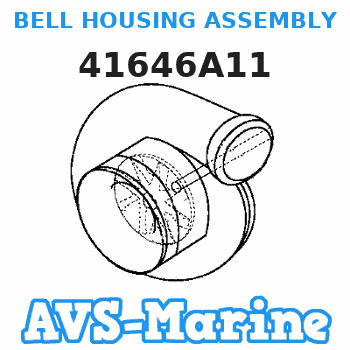
41646A11 BELL HOUSING ASSEMBLY Mercruiser
5E31200N1, 5E31200TP, 5E31200TS, 5E31210TP, 5E31210TS, 5E31800TP, 5E31800TS, 5E31810TP, 5E31810TS, 5E31900TP, 5E31900TS, 5E31910TP, 5E31910TS, 5E32200TP, 5E32900TS, 5E36200TP, 5E36200TS, 5E36210TP, 5E36210TS, 5E36800TP, 5E36800TS, 5E36810TP, 5E36810T
BELL

Price: query
Rating:
You can buy parts:
As an associate, we earn commssions on qualifying purchases through the links below
$854.81
17-04-2023
10.0[4.50] Pounds
-: -
Mercruiser New OEM Gimbal Bell Housing Kit Bravo 41646A11
SKU: 41646A11 || Sold Each || Please verify your own fitment
SKU: 41646A11 || Sold Each || Please verify your own fitment
Compatible models:
5E31200N1
5E31200TP
5E31200TS
5E31210TP
5E31210TS
5E31800TP
5E31800TS
5E31810TP
5E31810TS
5E31900TP
5E31900TS
5E31910TP
5E31910TS
5E32200TP
5E32900TS
5E36200TP
5E36200TS
5E36210TP
5E36210TS
5E36800TP
5E36800TS
5E36810TP
5E36810TS
5E36900TS
5E36910TP
5E36910TS
5H41400TP
5H41410TP
5H41410TS
5H41600TP
5H41610TP
5H41610TS
5H42300TP
5H42300TS
5H42400TS
5M41400TP
5M41400TS
5M42300TP
5M42300TS
5T32300TP
5T32300TS
5X32200TS
6511102N1
Mercruiser
Mercruiser entire parts catalog list:
5E31200TP 1998
5E31200TS 1998
5E31210TP 1998
5E31210TS 1998
5E31800TP 1998
5E31800TS 1998
5E31810TP 1998
5E31810TS 1998
5E31900TP 1998
5E31900TS 1998
5E31910TP 1998
5E31910TS 1998
5E32200TP 1998
5E32900TS 1998
5E36200TP 1998
5E36200TS 1998
5E36210TP 1998
5E36210TS 1998
5E36800TP 1998
5E36800TS 1998
5E36810TP 1998
5E36810TS 1998
5E36900TS 1998
5E36910TP 1998
5E36910TS 1998
5H41400TP 1998
5H41410TP 1998
5H41410TS 1998
5H41600TP 1998
5H41610TP 1998
5H41610TS 1998
5H42300TP 1998
5H42300TS 1998
5H42400TS 1998
5M41400TP 1998
5M41400TS 1998
5M42300TP 1998
5M42300TS 1998
5T32300TP 1998
5T32300TS 1998
5X32200TS 1998
6511102N1 1998
Information:
Table 1
Required Tools
Tool Part Number Part Description Qty
A 138-7573 Link Brackets 3
B 140-7742 Sleeve 1
C 1U-8760 Chain Wrench 1 Note: Cleanliness is an important factor. Before the removal procedure, the exterior of the component should be thoroughly cleaned. This will help to prevent dirt from entering the internal mechanism.
Care must be taken to ensure that fluids are contained during performance of inspection, maintenance, testing, adjusting and repair of the product. Be prepared to collect the fluid with suitable containers before opening any compartment or disassembling any component containing fluids.Refer to Special Publication, NENG2500, "Caterpillar Dealer Service Tool Catalog" for tools and supplies suitable to collect and contain fluids on Caterpillar products.Dispose of all fluids according to local regulations and mandates.
Personal injury can result from hot coolant, steam and alkali.At operating temperature, engine coolant is hot and under pressure. The radiator and all lines to heaters or the engine contain hot coolant or steam. Any contact can cause severe burns.Remove cooling system pressure cap slowly to relieve pressure only when engine is stopped and cooling system pressure cap is cool enough to touch with your bare hand.Do not attempt to tighten hose connections when the coolant is hot, the hose can come off causing burns.Cooling System Coolant Additive contains alkali. Avoid contact with skin and eyes.
Turn the battery disconnect switch to the OFF position.
Drain the coolant into a suitable container for storage or disposal. Refer to Operation and Maintenance Manual, "Cooling System Coolant (ELC) - Change".
Illustration 1 g01451436
Illustration 2 g01451438
Remove bolts (1). Attach Tooling (A) and a suitable lifting device to panel assembly (5). The weight of panel assembly (5) is approximately 45 kg (100 lb).
Open door assembly (2). Remove handles (3) and (4). Remove bolts (6) and remove guard assembly (5) .
Illustration 3 g01452266
Remove tube (10). Disconnect hose (7) and bracket (9). Remove guard assembly (8) .
Illustration 4 g01452353
Attach Tooling (B) and a suitable lifting device to fan assembly (11). The weight of fan assembly (11) is approximately 23 kg (50 lb). Remove bolts (12) and reposition fan assembly (11) .
Use Tooling (C) in order to remove adapter (14). Remove bolts (13) and adapter (14) .
Remove fan assembly (11) .Installation Procedure
Table 2
Required Tools
Tool Part Number Part Description Qty
A 138-7573 Link Brackets 3
B 140-7742 Sleeve 1
C 1U-8760 Chain Wrench 1 Note: Cleanliness is an important factor. Before the removal procedure, the exterior of the component should be thoroughly cleaned. This will help to prevent dirt from entering the internal mechanism.
Illustration 5 g01452353
Attach Tooling (B) and a suitable lifting device to fan assembly (11). The weight of fan assembly (11) is approximately 23 kg (50 lb). Position fan (11) in the radiator guard.
Position adapter (14) and install bolts (13). Use Tooling (C) in order to install bolts (13). Tighten bolts (13) to a torque of 30 7 N m (22 5 lb ft).
Position fan assembly (11) onto adapter (14). Install bolts (12) .
Illustration 6 g01452266
Install guard assembly (8). Connect hose (7) and bracket (9). Install tube (10).
Illustration 7 g01451438
Parts bell Mercruiser:
41646A10
41646A10 BELL HOUSING ASSEMBLY, Use Without Trim Senders
5120136JS, 5120150AR, 5220200AS, 5231100LP, 5C30150FS, 6020006JS, 6211001N1, 6311002NZ, 6315002NZ, 6416003N2, 6511102N1, 6811001N1
41646A 9
41646A 9 BELL HOUSING ASSEMBLY
5120136JS, 5120150R1, 5231100LP, 5231100TP, 5232100N1, 5232100TP, 5C30150FS, 5E31200N1, 5E31200TP, 5E31200TS, 5E31210TP, 5E31210TS, 5E31800TP, 5E31800TS, 5E31810TP, 5E31810TS, 5E31900TP, 5E31900TS, 5E31910TP, 5E31910TS, 5E32200TP, 5E32900TS, 5E36200T
866457A01
866457A01 BELL HOUSING ASSEMBLY
5231100TP, 5232100TP, 5E31200TP, 5E31200TS, 5E31210TP, 5E31210TS, 5E31800TP, 5E31800TS, 5E31810TP, 5E31810TS, 5E31900TP, 5E31900TS, 5E31910TP, 5E31910TS, 5E32200TP, 5E32900TS, 5E36200TP, 5E36200TS, 5E36210TP, 5E36210TS, 5E36800TP, 5E36800TS, 5E36810T

