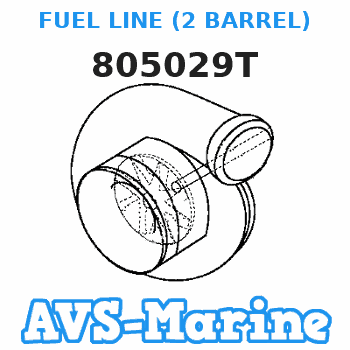
805029T FUEL LINE (2 BARREL) Mercruiser
443B0002S, 443B1003S, 443B100JS
FUEL

Price: query
Rating:
Mercruiser entire parts catalog list:
- FUEL PUMP AND FUEL FILTER » 805029T
- FUEL PUMP AND FUEL FILTER » 805029T
- FUEL PUMP AND FUEL FILTER » 805029T
Information:
START BY:a) remove valve covers For the removal of the fuel injection nozzles only do steps 1, 3 and 5. 1. Use tool (A) and remove fuel lines (1) from the fuel injection nozzles and the adapters. Put caps over all fuel line openings to keep dirt or foreign material out of the fuel system. Put identification marks on the push rods as to their location in the engine. 2. Use tool (B) to make a separation of the push rods and the rocker arms. Remove the push rods. 3. Remove nuts (4) that hold fuel injection nozzles and bodies (2) to the direct injection adapters.4. Make a note of the relation of the exhaust valve bridges to the intake valve bridges and remove bridges (3) from the bridge dowels. 5. Fasten tool (C) on the bodies and pull the bodies and the fuel injection nozzles from the direct injection adapters. If necessary, remove the seals and the nozzles from the bodies. Before any fuel injection adapters are removed, the coolant must be drained from the cooling system.6. Install tool (D) in direct injection adapters (5) and use a wrench of the correct size to loosen the direct injection adapters. Remove direct injection adapters (5) from the cylinder head.Install Fuel Injection Nozzles And Direct Injection Adapters
For the installation of the fuel injection nozzles only do Steps 3 through 7, 11 and 12. 1. Put liquid soap (40% solid) in the bore of the cylinder head and on O-ring seals (1).2. Put 5P3931 Anti-Seize Compound on the threads of direct injection adapters (3). Install washers (2) and direct injection adapters (3) in the cylinder head. Use tool (A) and tighten the direct injection adapters to a torque of 205 14 N m (150 10 lb.ft.). 3. Put clean fuel on tool (E) and seals (4). Use tool (E) to install seals (4) on the bodies.4. Install nozzles (5) on the bodies finger tight only.5. Put a small amount of clean fuel in the bore of the adapters.6. Install tool (B) on the bodies. Install the bodies and fuel injection nozzles in direct injection adapters (3). Make sure the grooves (serrations) in the bodies are in alignment with the grooves (serrations) in the adapters. 7. Install nuts (7) that hold the bodies and the fuel injection nozzles in position. Tighten the nuts to a torque of 75 7 N m (55 5 lb.ft.).8. Put clean engine oil on the dowels and install valve bridges (6).9. Push straight down on the top contact surface of the bridge with a force of 4 to 45 N (1 to 10 lb.). Turn the adjustment screw clockwise until contact is made with the valve stem. Turn the adjustment screw 20° to 30° more to keep bridge (4) straight on the dowel. Hold the adjustment screw in this position and tighten the locknut to a torque of 28 4 N m (22 3 lb.ft.). 10. Install push rods (8) with tool (C). Be sure the push rods are in their correct locations in the engine. 11. Put clean fuel on O-ring seals (9).12. Use tool (D) and install fuel lines (10). Tighten the nuts to a torque of 41 7 N m (30 5 lb.ft.).13. Check the valve clearance and make adjustments as needed. See Install Rocker Shafts And Push Rods.14. Fill the cooling system with coolant to the correct level. See the Maintenance Guide.END BY:a) install valve covers
For the installation of the fuel injection nozzles only do Steps 3 through 7, 11 and 12. 1. Put liquid soap (40% solid) in the bore of the cylinder head and on O-ring seals (1).2. Put 5P3931 Anti-Seize Compound on the threads of direct injection adapters (3). Install washers (2) and direct injection adapters (3) in the cylinder head. Use tool (A) and tighten the direct injection adapters to a torque of 205 14 N m (150 10 lb.ft.). 3. Put clean fuel on tool (E) and seals (4). Use tool (E) to install seals (4) on the bodies.4. Install nozzles (5) on the bodies finger tight only.5. Put a small amount of clean fuel in the bore of the adapters.6. Install tool (B) on the bodies. Install the bodies and fuel injection nozzles in direct injection adapters (3). Make sure the grooves (serrations) in the bodies are in alignment with the grooves (serrations) in the adapters. 7. Install nuts (7) that hold the bodies and the fuel injection nozzles in position. Tighten the nuts to a torque of 75 7 N m (55 5 lb.ft.).8. Put clean engine oil on the dowels and install valve bridges (6).9. Push straight down on the top contact surface of the bridge with a force of 4 to 45 N (1 to 10 lb.). Turn the adjustment screw clockwise until contact is made with the valve stem. Turn the adjustment screw 20° to 30° more to keep bridge (4) straight on the dowel. Hold the adjustment screw in this position and tighten the locknut to a torque of 28 4 N m (22 3 lb.ft.). 10. Install push rods (8) with tool (C). Be sure the push rods are in their correct locations in the engine. 11. Put clean fuel on O-ring seals (9).12. Use tool (D) and install fuel lines (10). Tighten the nuts to a torque of 41 7 N m (30 5 lb.ft.).13. Check the valve clearance and make adjustments as needed. See Install Rocker Shafts And Push Rods.14. Fill the cooling system with coolant to the correct level. See the Maintenance Guide.END BY:a) install valve covers
Parts fuel Mercruiser:
805656A 2
805028T
805032T
805031T
805497T
805638T
806771


