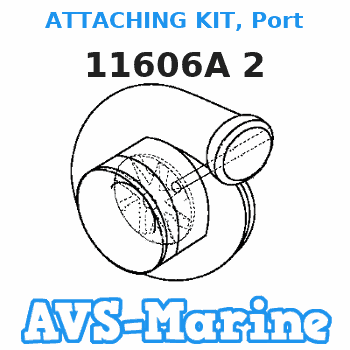
11606A 2 ATTACHING KIT, Port Mercury
1006201DB, 1006201PD, 1006201RB, 1006201VB, 1006211RD, 1008211RD, 1010207VB, 1011201DB, 1016207PD, 1016207RB
ATTACHING

Price: query
Rating:
You can buy parts:
As an associate, we earn commssions on qualifying purchases through the links below
$96.00
11-04-2023
7.0[3.15] Pounds
-: -
Mercury Marine/Mercruiser New OEM Outboard Port Tie Rod, 11606A2, 14071
$79.67
10-04-2021
2.81[0.90] Pounds
-: -
New Mercury Mercruiser Quicksilver O Part # 11606A2 ATTACHING KT-PORT 1
Part Manufacturer: Mercury Marine ; Part Number : 11606A2 ; UPC: 745061104679 || Orientation: Port side || Engine fittings: 10 HP MAGNUM, 10 HP MARATHON , 10 HP SEA PRO , 10 HP VIKING, 15 HP MARATHON, 15 HP SEA PRO, 15 HP VIKING , 6 HP, 8 HP, 9.9 HP || Sold as seen in pictures; Note every computer shows colors differently; All measurements are approximate; Hardware and instruction/installation manual included
Part Manufacturer: Mercury Marine ; Part Number : 11606A2 ; UPC: 745061104679 || Orientation: Port side || Engine fittings: 10 HP MAGNUM, 10 HP MARATHON , 10 HP SEA PRO , 10 HP VIKING, 15 HP MARATHON, 15 HP SEA PRO, 15 HP VIKING , 6 HP, 8 HP, 9.9 HP || Sold as seen in pictures; Note every computer shows colors differently; All measurements are approximate; Hardware and instruction/installation manual included
Compatible models:
Mercury entire parts catalog list:
- ACCESSORIES » 11606A 2
- ACCESSORIES » 11606A 2
- ACCESSORIES » 11606A 2
- ACCESSORIES » 11606A 2
- ACCESSORIES » 11606A 2
- ACCESSORIES » 11606A 2
- ACCESSORIES » 11606A 2
- ACCESSORIES » 11606A 2
- ACCESSORIES » 11606A 2
- ACCESSORIES » 11606A 2
Information:
Table 1
Diagnostic Trouble Codes for DEF Pressure Does Not Respond
J1939 Code Description Notes
3362-7 Aftertreatment #1 DEF Dosing Unit Input Lines : Not Responding Properly The ECM detects that the DEF backflow line pressure is not responding.
The battery voltage is at least 10 V.
The warning lamp will come on. The DEF system will purge.
The diagnostic code will be cleared when the keyswitch has been cycled and the DEF lines have been defrosted.
The DEF pressure line pressure is not responding after the defrosting period.
The battery voltage is at least 10 V.
The warning lamp will come on. The DEF system will purge.
The diagnostic code will be cleared when the keyswitch has been cycled and the fault does not reoccur.
4334-7 Aftertreatment 1 Diesel Exhaust Fluid Doser Absolute Pressure : Not Responding Properly The ECM detects that the DEF pressure does not reach 100 kPa (14.5 psi) after ten attempts to pressurize the system.
The battery voltage is at least 10 V.
The warning lamp will come on. DEF dosing will be disabled while this diagnostic code is active.
The ECM detects that the DEF pump is unable to reduce the DEF pressure while the system is purging.
The warning lamp will come on.
4334-10 Aftertreatment 1 Diesel Exhaust Fluid Doser Absolute Pressure : Abnormal Rate of Change The ECM detects that the DEF pressure is not stable during ten attempts to pressurize the system.
The battery voltage is at least 10 V.
The warning lamp will flash. The DEF system will be purged and the engine will be derated.
The diagnostic code will be cleared when the keyswitch has been cycled and the fault does not reoccur.
Follow the troubleshooting procedure in order to identify the root cause of the fault.
Illustration 1 g03713516
View of the DEF pump module
(1) DEF backflow line connector
(2) DEF pressure line connector
(3) DEF suction line connector
Illustration 2 g03713528
View of the DEF tank and DEF tank header unit
(4) DEF backflow line connector
(5) DEF suction line connector Complete the procedure in the order in which the steps are listed.
Table 2
Troubleshooting Test Steps Values Results
1. Check the Level in the DEF Tank
A. Check that there is sufficient DEF in the DEF tank.
Note: If there is insufficient DEF in the DEF tank, the system can fill with air.
DEF Level
Result: There is not enough DEF in the DEF tank.
Repair: Fill the DEF tank with DEF. Refer to Operation and Maintenance Manual, "Diesel Exhaust Fluid - Fill".
Result: The level in the DEF tank is OK.
Proceed to Test Step 2.
2. Check for Diagnostic Trouble Codes
A. Turn the keyswitch to the ON position. Do not start the engine.
B. Connect to the electronic service tool.
C. Check for active or recently logged diagnostic trouble codes.
Diagnostic trouble codes
Result: One of the diagnostic codes listed in Table 1 is active or recently logged.
Proceed to Test Step 3.
Result: A code other than 4334-7 is active or recently logged.
Repair: Troubleshoot the logged or active code. Refer to Troubleshooting, "Diagnostic Trouble Codes".
3. Check the DEF Line Heaters
A. Check that the DEF line heaters are working correctly.
Refer to Troubleshooting, "DEF Line Heater - Test".
DEF line heaters
Result: The DEF line heaters are not OK.
Repair: Make any necessary repairs. Refer to Troubleshooting, "DEF Line Heater - Test".
Start the engine. If the fault is still present, proceed to Test Step 4.
Result: The DEF line heaters are OK.
Proceed to Test Step 4.
4. Inspect the DEF Lines for Leaks
A. Turn the keyswitch to the ON position. Do not start the engine.
B. Ensure that the DEF lines are connected to the correct connectors on the DEF pump and the DEF tank header.
C. Remove the DEF injector from the SCR cannister.
D. Connect to the electronic service tool.
E. Use the electronic service tool to perform the "DEF Dosing System Verification Test".
F. Visually inspect all DEF lines. Look for pinched, damaged, or disconnected lines. Inspect the lines for leaks.
G. Inspect the DEF injector for signs of leakage.
H. Turn the keyswitch to the OFF position.
DEF Lines
Result: The DEF lines are not installed correctly.
Repair: Install the DEF lines to the correct connectors.
Use the electronic service tool to perform the "DEF Dosing System Verification Test" and check that the diagnostic code is no longer active.
Result: The lines are leaking, damaged, pinched, or disconnected.
Repair: Make the necessary repairs.
Result: The DEF lines are installed correctly.
Repair: Proceed to Test Step 5.
5. Check the DEF Lines for Obstructions
A. Remove the suction line from the DEF tank header (5) and DEF pump (3).
B. Remove the pressure line from the DEF injector and DEF pump (2).
C. Remove the backflow line from the DEF pump (1) and the DEF pump header (4).
D. Inspect the lines for obstructions. Flush lines with water/low pressure air if necessary.
Note: Possible obstructions are ice, DEF deposits, or debris.
E. Inspect the DEF tank filter and the DEF pump filter for signs of debris.
Obstructions
Result: An obstruction was found.
Flush the line or replace the line.
Install the pressure lines.
Result: Debris was found in the DEF tank filter or the DEF pump filter.
Repair: Replace the filters. Refer to Operation and Maintenance Manual for the correct procedure.
Result: An obstruction was not found.
Proceed to Test Step 6.
6. Check the DEF Pump
A. Reconnect the suction line to DEF tank header (5) and DEF Pump (3).
B. Reconnect the backflow line to DEF pump (1) and DEF tank header (4).
C. Reconnect the pressure line to DEF pump (2).
D. Place the other end of the DEF pressure line into a suitable container for collecting the DEF.
E. Use the electronic service tool to perform the "DEF Dosing System Accuracy Test".
DEF flow
Result: DEF flowed from the pressure line into the container.
Proceed to Test Step 7.
Result: Little or no DEF flowed from the pressure line into the container.
Repair: Install a replacement DEF pump module. Refer to Disassembly and Assembly for the correct procedure.
Proceed to Test Step 8.
7. Check the DEF Injector for Obstructions
A. Perform a "DEF Dosing System Accuracy Test". Refer to Systems Operation, Testing and Adjusting, "Aftertreatment SCR System Dosing - Test".
Observe the spray pattern and the volume of DEF that is collected.
B. Inspect the DEF injector for debris, white deposits, or obstruction.
DEF volume and spray pattern
Result: The DEF injector delivers the
Parts attaching Mercury:
42805A 6

42805A 6 ATTACHING KIT, Remote Control
1006201DB, 1006201PD, 1006201RB, 1006201VB, 1006211RD, 1008211RD, 1010207VB, 1011201DB, 1016207PD, 1016207RB
11606A 1

11606A 1 ATTACHING KIT, Starboard
1006201DB, 1006201PD, 1006201RB, 1006201VB, 1006211RD, 1008211RD, 1010207VB, 1011201DB, 1016207PD, 1016207RB
12569A 1
12569A 1 ATTACHING KIT, Cable And Pulley
1006201DB, 1006201PD, 1006201RB, 1006201VB, 1006211RD, 1008211RD, 1010207VB, 1011201DB, 1016207PD, 1016207RB

