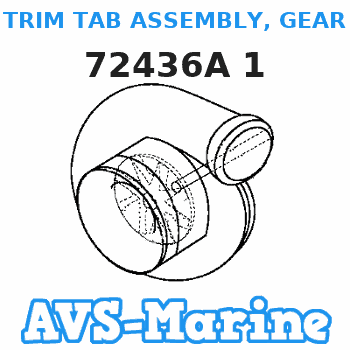
72436A 1 TRIM TAB ASSEMBLY, GEAR HOUSING Mercury
1850503
TRIM

Price: query
Rating:
You can buy parts:
As an associate, we earn commssions on qualifying purchases through the links below
$25.69
14-08-2023
-: -
Boat Motor 31640Q4 31640B4 31640T6 31640A1 46399A1 822777Q1 72436A1 97-8M0059338 Trim Tab Anode for Mercury Marine Mercruiser Quicksilver Outboard Engine 40HP-140HP, 18-6241
Replaces Part OEM Number#: 31640 31640Q4 316403 316404 316406 31640A4 31640B4 31640Q03 31640A1 31640A2 97-31640Q4 97-31640T4 97-31640T6 46399 46399A1 822777Q1 72436A1 822777 8227772 822777A1 || Engine: 40HP-140HP || Engine Position: Outboard || If you are unsure, please provide your engine serial number.
Replaces Part OEM Number#: 31640 31640Q4 316403 316404 316406 31640A4 31640B4 31640Q03 31640A1 31640A2 97-31640Q4 97-31640T4 97-31640T6 46399 46399A1 822777Q1 72436A1 822777 8227772 822777A1 || Engine: 40HP-140HP || Engine Position: Outboard || If you are unsure, please provide your engine serial number.
$26.16
03-05-2024
0.2866[0.13] Pounds
US: Boats & More
Sierra International Sierral 18-6241 Anode Magnesium
Sierra Fits : Most Mercury/Mariner O/B's 35hp & above and all MerCruiser except Bravo || Material : Magnesium
Sierra Fits : Most Mercury/Mariner O/B's 35hp & above and all MerCruiser except Bravo || Material : Magnesium
Compatible models:
1850503
Mercury
Mercury entire parts catalog list:
Information:
Table 1
Specifications for 336-5446 Inlet Valve and 336-5447 Exhaust Valve
Callout Part Number Part Name Specification Description
3 332-7941 Spring The load for the inlet valve spring is
209 to 231 N (47 to 52 lb).
The length of the inlet valve spring is
31.5 mm (1.2402 inch).
The load for the inlet valve spring is
389.5 to 430.5 N (87.5 to 97 lb).
The length of the inlet valve spring is
22.2 mm (0.87401 inch).
3 326-7290 Spring The load for the exhaust valve spring is
161.5 to 178.5 N (36.3 to 40.1 lb).
The length of the exhaust valve spring is
31.5 mm (1.2402 inch).
The load for the exhaust valve spring is
337.9 to 373.5 N (76 to 84 lb).
The length of the exhaust valve spring is
21.5 mm (0.8465 inch).
- - - Inlet valve face angle is 30 degrees.
Exhaust valve face angle is 45 degrees.
- - - Inlet valve stem diameter is
0.03 mm (0.0018 inch).
Maximum clearance of the inlet valve stem is
0.05 mm (0.0020 inch).
The service limit for the inlet valve stem is
0.08 mm (0.0031 inch).
Exhaust valve stem diameter is
5.927 to 5.942 mm (0.2333 to 0.2339 inch).
Maximum clearance of the exhaust valve stem is
0.065 mm (0.0026 inch).
The service limit for the exhaust valve stem is
0.09 mm (0.0035 inch).
5 - Valve Length of inlet valve is
107.925 to 108.375 mm (4.2490 to 4.2667 inch).
Length of exhaust valve is
107.703 to 108.153 mm (4.2403 to 4.2580 inch).
- - - Diameter of inlet valve head is
35 mm (1.3780 inch).
Diameter of inlet valve head is
33 mm (1.2992 inch). Removal Procedure
Table 2
Required Tools
Tool Part Number Part Description Qty
A 9U-6195 Valve Spring Compressor 1
268-1969 Adapter 1
276-1221 Head 1 Start By:
Remove the cylinder head. Refer to Disassembly and Assembly, "Cylinder Head" for the correct procedure.
Keep all parts clean from contaminants.Contaminants may cause rapid wear and shortened component life.
Clean the bottom mating surface of the cylinder head. Check the depth of the valves below the face of the cylinder head before the valve springs are removed.
Place a temporary identification mark on the heads of the valves in order to identify the correct position.Note: Inlet valves have a recess in the center of the head.
Use a suitable lifting device to position the cylinder head with the valve springs upward. The weight of the cylinder head is approximately 65 kg (143 lb).Note: Ensure that the cylinder head is kept on a clean, soft surface in order to prevent damage to the machined face.
Personal injury can result from being struck by parts propelled by a released spring force.Make sure to wear all necessary protective equipment.Follow the recommended procedure and use all recommended tooling to release the spring force.
Illustration 1 g02511756
Install Tooling (A) in position on the cylinder head in order to compress appropriate valve spring (3) .
Ensure that the valve spring is compressed squarely or damage to the valve stem may occur.
Apply sufficient pressure to Tooling (A) in order to remove valve keepers (1) .Note: Do not compress the spring so that valve spring retainer (2) touches valve stem seal (4) .
Slowly release pressure on Tooling (A) .
Illustration 2 g02511676
Place a temporary identification mark on valve spring (3) in order to identify the correct position.
Remove valve spring retainer (2). Remove valve spring (3) .
Repeat Step 4 through Step 8 for the remaining valves.
Remove Tooling (A) .
Remove valve stem seals (4) .
Use a suitable lifting device in order to carefully turn over the cylinder head.
Remove valves (5) .Installation Procedure
Table 3
Required Tools
Tool


