17566-92D01 WATER INLET GROMMET Suzuki
DT8CENK, DT8CENL, DT8CLJ, DT8CLK, DT8CLL, DT8CLM, DT8CNK, DT8CNL, DT8CSJ, DT8CSL, DT8CSM, DT8MCLN, DT8MCLP, DT8MCLS, DT8MCLT, DT8MCLV, DT8MCSN, DT8MCSP, DT8MCSR, DT8MCSS, DT8MCST, DT8MCSV, DT8MSLR, DT8SCK, DT9.9 CELK, DT9.9CELJ, DT9.9CELL, DT9.9CELM,
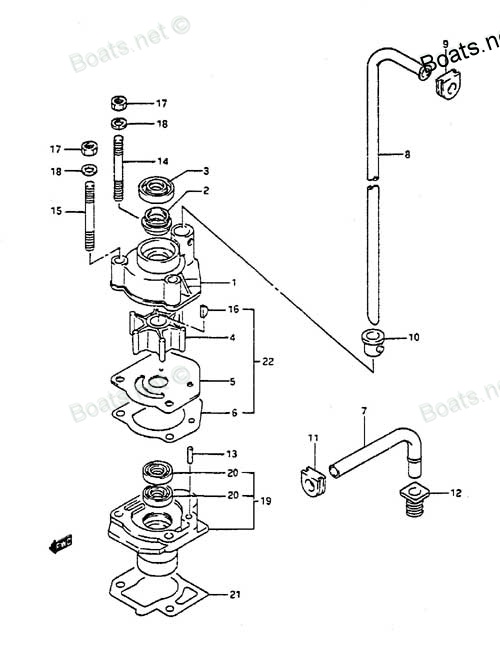
WATER

Price: query
Rating:
Number on catalog scheme: 11
Compatible models:
DT8CENK
DT8CENL
DT8CLJ
DT8CLK
DT8CLL
DT8CLM
DT8CNK
DT8CNL
DT8CSJ
DT8CSL
DT8CSM
DT8MCLN
DT8MCLP
DT8MCLS
DT8MCLT
DT8MCLV
DT8MCSN
DT8MCSP
DT8MCSR
DT8MCSS
DT8MCST
DT8MCSV
DT8MSLR
DT8SCK
DT9.9 CELK
DT9.9CELJ
DT9.9CELL
DT9.9CELM
DT9.9CELN
DT9.9CELP
DT9.9CELR
DT9.9CELS
DT9.9CELT
DT9.9CENK
DT9.9CESJ
DT9.9CESK
DT9.9CESL
DT9.9CESM
DT9.9CESN
DT9.9CESP
DT9.9CESR
DT9.9CESS
DT9.9CEST
DT9.9CNELP
DT9.9CNELR
DT9.9CNELS
DT9.9CNELT
DT9.9CNEXP
DT9.9CNEXR
DT9.9CNEXS
DT9.9CNEXT
DT9.9CNEXV
DT9.9CNJ
DT9.9CNK
DT9.9CNL
DT9.9CNLN
DT9.9MCLJ
DT9.9MCLK
DT9.9MCLL
DT9.9MCLM
DT9.9MCLN
DT9.9MCLP
DT9.9MCLR
DT9.9MCLS
DT9.9MCLT
DT9.9MCLV
DT9.9MCNLR
DT9.9MCNLT
DT9.9MCNLV
DT9.9MCSJ
DT9.9MCSK
DT9.9MCSL
DT9.9MCSM
DT9.9MCSN
DT9.9MCSP
DT9.9MCSR
DT9.9MCSS
DT9.9MCST
DT9.9MCSV
Suzuki
Suzuki entire parts catalog list:
- WATER PUMP » 17566-92D01
- WATER PUMP » 17566-92D01
- WATER PUMP » 17566-92D01
- WATER PUMP » 17566-92D01
- WATER PUMP » 17566-92D01
- WATER PUMP » 17566-92D01
- WATER PUMP » 17566-92D01
- WATER PUMP » 17566-92D01
- WATER PUMP » 17566-92D01
- WATER PUMP » 17566-92D01
- WATER PUMP » 17566-92D01
- WATER PUMP » 17566-92D01
- WATER PUMP » 17566-92D01
- WATER PUMP » 17566-92D01
- WATER PUMP » 17566-92D01
- WATER PUMP » 17566-92D01
- WATER PUMP » 17566-92D01
- WATER PUMP » 17566-92D01
- WATER PUMP » 17566-92D01
- WATER PUMP » 17566-92D01
- WATER PUMP » 17566-92D01
- WATER PUMP » 17566-92D01
- WATER PUMP » 17566-92D01
- WATER PUMP » 17566-92D01
- WATER PUMP » 17566-92D01
- WATER PUMP » 17566-92D01
- WATER PUMP » 17566-92D01
- WATER PUMP » 17566-92D01
- WATER PUMP » 17566-92D01
- WATER PUMP » 17566-92D01
- WATER PUMP » 17566-92D01
- WATER PUMP » 17566-92D01
- WATER PUMP » 17566-92D01
- WATER PUMP » 17566-92D01
- WATER PUMP » 17566-92D01
- WATER PUMP » 17566-92D01
- WATER PUMP » 17566-92D01
- WATER PUMP » 17566-92D01
- WATER PUMP » 17566-92D01
- WATER PUMP » 17566-92D01
- WATER PUMP » 17566-92D01
- WATER PUMP » 17566-92D01
- WATER PUMP » 17566-92D01
- WATER PUMP » 17566-92D01
- WATER PUMP » 17566-92D01
- WATER PUMP » 17566-92D01
- WATER PUMP » 17566-92D01
- WATER PUMP » 17566-92D01
- WATER PUMP » 17566-92D01
- WATER PUMP » 17566-92D01
- WATER PUMP » 17566-92D01
- WATER PUMP » 17566-92D01
- WATER PUMP » 17566-92D01
- WATER PUMP » 17566-92D01
- WATER PUMP » 17566-92D01
- WATER PUMP » 17566-92D01
- WATER PUMP » 17566-92D01
- WATER PUMP » 17566-92D01
- WATER PUMP » 17566-92D01
- WATER PUMP » 17566-92D01
- WATER PUMP » 17566-92D01
- WATER PUMP » 17566-92D01
- WATER PUMP » 17566-92D01
- WATER PUMP » 17566-92D01
- WATER PUMP » 17566-92D01
- WATER PUMP » 17566-92D01
- WATER PUMP » 17566-92D01
- WATER PUMP » 17566-92D01
- WATER PUMP » 17566-92D01
- WATER PUMP » 17566-92D01
- WATER PUMP » 17566-92D01
- WATER PUMP » 17566-92D01
- WATER PUMP » 17566-92D01
- WATER PUMP » 17566-92D01
- WATER PUMP » 17566-92D01
- WATER PUMP » 17566-92D01
- WATER PUMP » 17566-92D01
- WATER PUMP » 17566-92D01
- WATER PUMP » 17566-92D01
Information:
Ensure that the engine is stopped before performing this procedure. Attach a DO NOT OPERATE tag to the starting controls.
Do not drain the oil when the engine is cold. As the oil cools, suspended waste particles settle on the bottom of the oil pan. The waste particles are not removed when the cold oil is drained. Drain the crankcase with the oil warm, immediately after the engine is stopped. This draining method allows the waste particles that are suspended in the oil to be drained properly. Failure to follow this recommended procedure will allow the waste particles to be recirculated through the engine lubrication system with the new oil.
After the engine has been operated at normal operating temperature, STOP the engine.Note: Drain the oil into a suitable container. Dispose of fluids according to local regulations.
Drain the oil by using one of the following methods. Use the method that corresponds to the equipment on the engine.Note: If a suction device is used to remove the oil from the oil pan, ensure that the suction device is clean. This cleanliness will prevent dirt from entering into the oil pan. Be careful not to strike the engine oil suction tubes or the piston cooling jets.
If the engine has an oil drain valve, open the valve to drain the oil. After the oil has drained, close the valve.
If the engine has a pump for removing dirty oil, connect a hose to the outlet of the pump. Place the hose in a suitable container. Open the valve for the drain line. Operate the pump until the crankcase is empty. Close the valve to the drain line. Disconnect the hose.
If the oil drain valve has a “quick connect” coupling, attach the coupling. Open the drain valve to drain the crankcase. After the oil has drained, close the drain valve. Disconnect the coupling.
If the engine does not have a drain valve or a pump, remove an oil drain plug. Allow the oil to drain. After the oil has drained, clean the drain plug and clean the fitting for the drain plug. Install the drain plug. Tighten the drain plug to 145 15 N m (105 10 lb ft).Note: Ensure that the dirty oil is thoroughly drained from the pan. Caterpillar recommends a thorough cleaning of the oil pan with a vacuum and with rags to remove all old oil. This procedure will help prevent inaccurate oil analysis results and/or shortened life of the oil.
Replace the engine oil filter elements before filling the crankcase with new oil.
For the procedure to change the engine oil filters, refer to the Operation and Maintenance Manual, "Engine Oil Filter - Change" topic (Maintenance Section).
Engine damage can occur if the crankcase is filled above the "FULL" mark on the oil level gauge (dipstick).An overfull crankcase can cause the crankshaft to dip into the oil. This will reduce the power that is developed and also force air bubbles into the oil. These bubbles (foam) can cause the following problems: reduction of the oil's ability to lubricate, reduction of oil pressure, inadequate cooling, oil blowing out of the crankcase breathers and excessive oil consumption.Excessive oil consumption will cause deposits to form on the pistons and in the combustion chamber. Deposits in the combustion chamber lead to the following problems: guttering of the valves, packing of carbon under the piston rings and wear of the cylinder liner.If the oil level is above the "FULL" mark on the oil level gauge, drain some of the oil immediately.
Note: For the appropriate oil to use, and for the amount of oil to use, refer to this Operation and Maintenance Manual, "Refill Capacities and Recommendations" article (Maintenance Section).
Remove the oil filler cap. Fill the crankcase through the oil filler tube only. Clean the oil filler cap. Install the oil filler cap.
To prevent crankshaft damage and to prevent bearing damage, manually operate the prelube pump with the fuel supply line closed for 15 to 30 seconds. Or, crank the engine with the fuel supply line closed for 15 to 30 seconds. These procedures will ensure that all oil filters are filled with oil before the engine is started.
Close the fuel supply line. Crank the engine until the oil pressure gauge indicates 70 kPa (10 psi). Open the fuel supply line. Allow the starting motor to cool for 2 minutes before cranking again.
Follow this Operation and Maintenance Manual, "Starting The Engine" procedure (Operation Section). Operate the engine at low idle for 2 minutes. This procedure will ensure that the lubrication system and the oil filters are filled with oil. Inspect the engine for oil leaks. Ensure that the oil level is between the "ADD" and the "FULL" marks on the "LOW IDLE" side of the oil level gauge.
Stop the engine and allow the oil to drain back into the sump for a minimum of 10 minutes.
Remove the oil level gauge and check the oil level. Maintain the oil level between the "ADD" and the "FULL" marks on the "ENGINE STOPPED" side of the oil level gauge.
Parts water Suzuki:
99000-25350

99000-25350 WATER RESISTANT GREASE
DT150SSH, DT150SSJ, DT150SSK, DT150SSL, DT150SSM, DT150SSN, DT150STCLP, DT150STCLR, DT150STCLS, DT150STCLT, DT150TCLH, DT150TCLJ, DT150TCLK, DT150TCLL, DT150TCLM, DT150TCLN, DT150TCLP, DT150TCLR, DT150TCXGM, DT150TCXGN, DT150TCXGP, DT150TCXGR, DT150T
52117-92D00
52117-92D00 WATER INSPECTION TUBE
DF4, DF4, DF4, DF46, DF4L, DF6, DF6, DF6, DF6L, DT15C, DT8CENK, DT8CENL, DT8CLJ, DT8CLK, DT8CLL, DT8CLM, DT8CNK, DT8CNL, DT8CSJ, DT8CSL, DT8CSM, DT8MCLN, DT8MCLP, DT8MCLS, DT8MCLT, DT8MCLV, DT8MCSN, DT8MCSP, DT8MCSR, DT8MCSS, DT8MCST, DT8MCSV, DT8MSL
17631-92D01
17631-92D01 WATER FILTER
DF15, DF15, DF15, DF15S, DF9.9, DF9.9R, DF9.9RL, DF9.9S, DF9.9TH, DF9.9TH, DF99R, DF99TH, DT15C, DT8CENK, DT8CENL, DT8CLJ, DT8CLK, DT8CLL, DT8CLM, DT8CNK, DT8CNL, DT8CSJ, DT8CSL, DT8CSM, DT8MCLN, DT8MCLP, DT8MCLS, DT8MCLT, DT8MCLV, DT8MCSN, DT8MCSP,
61138-92D00
61138-92D00 WATER COVER
DT8CENK, DT8CENL, DT8CLJ, DT8CLK, DT8CLL, DT8CLM, DT8CNK, DT8CNL, DT8CSJ, DT8CSL, DT8CSM, DT8MCLN, DT8MCLP, DT8MCLS, DT8MCLT, DT8MCLV, DT8MCSN, DT8MCSP, DT8MCSR, DT8MCSS, DT8MCST, DT8MCSV, DT8MSLR, DT8SCK, DT9.9 CELK, DT9.9CELJ, DT9.9CELL, DT9.9CELM,
17410-92D00

17410-92D00 WATER PUMP CASE
DT8CENK, DT8CENL, DT8CLJ, DT8CLK, DT8CLL, DT8CLM, DT8CNK, DT8CNL, DT8CSJ, DT8CSL, DT8CSM, DT8MCLN, DT8MCLP, DT8MCLS, DT8MCLT, DT8MCLV, DT8MCSN, DT8MCSP, DT8MCSR, DT8MCSS, DT8MCST, DT8MCSV, DT8MSLR, DT8SCK, DT9.9 CELK, DT9.9CELJ, DT9.9CELL, DT9.9CELM,
17417-92D00
17417-92D00 WATER SEAL
DT8CENK, DT8CENL, DT8CLJ, DT8CLK, DT8CLL, DT8CLM, DT8CNK, DT8CNL, DT8CSJ, DT8CSL, DT8CSM, DT8MCLN, DT8MCLP, DT8MCLS, DT8MCLT, DT8MCLV, DT8MCSN, DT8MCSP, DT8MCSR, DT8MCSS, DT8MCST, DT8MCSV, DT8MSLR, DT8SCK, DT9.9 CELK, DT9.9CELJ, DT9.9CELL, DT9.9CELM,
17461-92D02

17461-92D02 WATER PUMP IMPELLER
DT8CENK, DT8CENL, DT8CLJ, DT8CLK, DT8CLL, DT8CLM, DT8CNK, DT8CNL, DT8CSJ, DT8CSL, DT8CSM, DT8MCLN, DT8MCLP, DT8MCLS, DT8MCLT, DT8MCLV, DT8MCSN, DT8MCSP, DT8MCSR, DT8MCSS, DT8MCST, DT8MCSV, DT8MSLR, DT8SCK, DT9.9 CELK, DT9.9CELJ, DT9.9CELL, DT9.9CELM,
17471-92D10
17471-92D10 WATER PUMP PLATE
DT8CENK, DT8CENL, DT8CLJ, DT8CLK, DT8CLL, DT8CLM, DT8CNK, DT8CNL, DT8CSJ, DT8CSL, DT8CSM, DT8MCLN, DT8MCLP, DT8MCLS, DT8MCLT, DT8MCLV, DT8MCSN, DT8MCSP, DT8MCSR, DT8MCSS, DT8MCST, DT8MCSV, DT8MSLR, DT8SCK, DT9.9 CELK, DT9.9CELJ, DT9.9CELL, DT9.9CELM,